Discover the stunning views that await you when hiking in the Philippines. From leisurely trails to challenging climbs up volcanoes and remote peaks, the Philippines offers a diverse range of hiking experiences for all skill levels. Read on to learn everything you need to know about hiking tours in the Philippines—including the top trails to explore, essential tips, and how to choose the right mountain for your next adventure.
When most people think of the Philippines, their minds drift to powdery white sands and turquoise waters—and for good reason. With over 7,000 islands, this Southeast Asian archipelago is world-renowned for its postcard-perfect beaches. But venture inland, and a different kind of adventure awaits.
Beyond the sun-soaked shores rise mist-covered mountains, lush jungles, cascading waterfalls, and captivating cave systems—offering a treasure trove of hiking experiences for every type of explorer. Whether you're a seasoned trekker or a casual weekend hiker, the Philippines boasts a diverse array of trails, peaks, and natural wonders just waiting to be discovered.
From the dramatic slopes of Mount Pulag to the volcanic trails of Mount Pinatubo and the scenic ridges of Mount Batulao, this guide will take you through some of the best mountains to hike in the Philippines—along with essential tips to help you plan the perfect adventure. Read on before you lace up your boots and start packing!

The Philippines is divided into three main island regions: Luzon, Visayas, and Mindanao. Each region boasts a diverse selection of mountains, with established trails that cater to all levels of hikers.
It’s also important to note that the Philippines lies within the Pacific Ring of Fire, meaning the country is home to several volcanic mountains. These volcanic peaks offer some of the most thrilling and scenic hiking experiences in the country. From dormant giants to active volcanoes, the varied terrain presents both challenges and rewards for adventurers.
Whether you’re a beginner seeking a gentle climb or an advanced hiker in search of a more demanding ascent, the Philippines has a mountain that will both inspire and challenge you.
Hiking in the Philippines: What to Expect

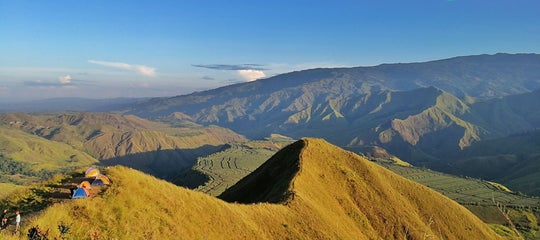
Philippine summits offer breathtaking views that differ from mountain to mountain. Common sights include a sea of clouds, towering rock formations, rolling hills, as well as panoramic views of winding rivers, picturesque lakes, and pristine coves.
As a tropical country, the Philippine jungles are also blessed with some of the most impressive biodiversity. The unique flora and fauna you’ll witness along the mountain trails are just as breathtaking as the scenery you’ll witness at the summit.
Imagine walking through forests of towering pine trees, or hiking through trails lined with brightly colored wildflowers, or trekking through a forest covered in moss and ferns.
In some mountains, you’ll even encounter exotic plants; from different species of pitcher plants, a variety of orchids, to the largest flower in the world, the Rafflesia.
If picturing all of the above has your heart pumping already, then you’ll want to take notes.
Hiking in the Philippines, just like anywhere else in the world requires physical and mental preparation no matter the level of difficulty. Aside from the raw beauty of the famous mountains in the Philippines, you should also expect challenging rugged terrain.
Although many hiking destinations in the country have established trails, exploring the wild outdoors still requires a certain degree of caution and presence of mind to ensure that you have a fun-filled and rewarding climb.
Classification of Philippine Mountains

Not all mountain trails in the Philippines are beginner-friendly. So, before planning a hiking trip, it’s important to know which ones are suitable for your level. Understanding how mountains are classified in the Philippines is the first step to making sure you enjoy your hiking adventure.
Types of Hikes and Difficulty Levels
In the Philippines, hikers choose which mountain to climb by using the “relative” difficulty rating system devised by the author of Pinoy Mountaineer, Gideon Lasco. This system serves as an informal classification of Philippine mountains used by Filipino mountaineers when planning hikes.
- Check out our article on the best hiking spots near Manila
The Pinoy Mountaineer difficulty rating system includes a minor/major classification and a difficulty scale of 1-9 which takes into consideration the length of the hike and the preparations required. This system also incorporates the internationally recognized Trail Class system of 1-5.
Here’s a breakdown of how the difficulty of Philippine hiking destinations is assessed:
Minor Hike
Hiking destinations that can be accomplished within a day without extraordinary physical effort and take a maximum of 5 hours from the jump-off point to the summit are considered “Minor.” A good example of this is the Mt. Batulao day hike in Batangas Province or the Mt. Mariglem day hike in Zambales Province.
Major Hike
It’s also important to note that in the Philippines, hiking trails that take more than 5 hours to complete are typically classified as “Major” hikes, even if they can be finished in a single day. For example, the Mt. Makiling/Sto. Tomas-Los Baños Traverse (locally known as “MakTrav”) or the Mt. Arayat day hike can sometimes stretch to 8 hours or more, depending on the weather and trail conditions.
Trail Class/Terrain Rating system
This is an internationally recognized scale that describes the type of terrain that hikers can expect on a specific trail.
Trail Class 1
An easy stroll on a well-established trail (Ex. Osmeña Peak)
Trail Class 2
Rugged paths with somewhat steep slopes (Ex. Mt. Pulag via Ambangeg hike)
Trail Class 3
Moderately steep terrain that may require scrambling (Ex. Mt. Kabunian hike)
Trail Class 4
Very steep slopes and easy cliffs in which beginners must be roped (Ex. Mt. Apo hiking trip)
Trail Class 5
Highly difficult and technical trails wherein ropes are required, as well as free hands as a climbing method (Ex. Mt. Guiting-Guiting)
Take note that most climbs involve a combination of trail classes, the more prevalent trail class is put first. For example, Mt. Apo via Kidapawan is a Trail Class 2-4, and the hike to Mt. Pulag via Ambangeg is Trail Class 1-2.
Difficulty Scale

The Pinoy Mountaineer difficulty rating is a numerical scale of 1-9, with 1 as the easiest and 9 as the most difficult. Although this classification system is only recognized in the Philippines, it gives hikers a good idea of how difficult a climb is by comparing one mountain with another.
For instance, mountains like Mt. Guiting-Guiting, Mt. Halcon, and Mt. Mantalingajan (collectively dubbed as the Knife Edge Trilogy) are scored 9/9 under this system. These mountains have technical trails that only seasoned hikers can survive.
You need to be in top physical state to negotiate the perilous trails of these mountains. Whereas, easy day hikes to waterfalls such as the Taytay Falls is only 1/9 and only takes less than an hour to reach.
1/9 Difficulty
Minor hikes that are Trail Class 1. These trails often have paved pathways and are very easy to navigate. It takes less than an hour to complete these trails. Examples:
-
Taytay Falls, Laguna
-
Daranak Falls, Rizal
-
Mt. Samat, Bataan
2/9 Difficulty
Minor hikes that don’t exceed Trail Class 2. These destinations have well-established trails that are easy to negotiate. These destinations do not take more than 2-3 hours to hike. This is a good entry-level for first-time hikers. Examples:
-
Osmeña Peak Day Hike, Cebu
-
Mt. Gulugod-Baboy day hike, Batangas
-
Mt. Manalmon day hike, Bulacan
-
Mt. 387 day hike, Nueva Ecija
3/9 Difficulty
Mostly minor hikes take less than 2 hours but have parts exceeding Trail Class 3, or hikes that 2-5 hours but do not exceed Trail Class 2. These trails are mildly difficult, but still very beginner-friendly and are highly recommended for first-timers. Examples:
-
Mt. Fato & Mt. Kupapey Twin Hike, Mountain Province
-
Mt. Ulap Traverse Day Hike, Benguet
-
Mt. Pulag via Ambangeg Day Hike, Benguet
-
Mt. Talamitam day hike, Batangas
-
Mt. Batolusong day hike, Rizal
-
Mt. Maculot Rockies Day Hike, Batangas
-
Mt. Mapalad day hike, Rizal
-
Mt. Sawi day hike, Nueva Ecija
-
Mt. Matarem Day Hike, Batanes
4/9 Difficulty
Mostly minor hikes that take 2-5 hours with parts of Trail Class 3 or higher; or hikes that last 5-9 hours but with not exceeding Trail Class 2. These hikes are of average difficulty, but still beginner-friendly. Examples:
-
Mt. Arayat day hike, Pampanga
-
Mt. Batulao, Batangas
-
Mt. Tarak Ridge day hike, Bataam
-
Mt. Iraya Day Hike, Batanes
-
Lake Holon, South Cotabato
-
Mt. Napulak, Iloilo
-
Mt. Hibok-Hibok, Camiguin Island
5/9 Difficulty
Major hikes that take 5-9 hours to complete and with parts that are Trail Class 3 or higher; or treks that take a whole day but do not exceed Trail Class 2. These treks are moderate difficulty and are not recommended for beginners. Examples:
-
Mt. Tres Marias, Biliran
-
Mt. Ugo Traverse, Benguet
-
Mt. Makiling Traverse (MakTrav), Laguna and Batangas
-
Mt. Tenglawan, Benguet
6/9 Difficulty
Major hikes with Trail Class 5 or location-specific features. These are challenging treks that usually require at least 2 days to negotiate. Beginners are discouraged from attempting this level without prior hiking experience and intense physical and mental preparation. Examples:
-
Mt. Balingkilat Traverse, Zambales
-
Mt. Talinis Traverse, Negros Oriental
-
Mt. Dulang Dulang (D2), Bukidnon
7/9 Difficulty
Major hikes that take 5-9 hours with trails that are class 4 or higher and have extreme weather conditions or treks that require 3 or more days. These hiking destinations are considerably difficult and should only be attempted by intermediate-level hikers. Examples:
-
Cawag Hexa, Zambales
-
Mt. Pulag via Akiki-Ambangeg, Benguet
-
Mt. Kanlaon via Mapot-Masulog, Negros
-
Mt. Apo via Kidapawan-Magpet, North Cotabato and Davao
8/9 Difficulty
Major hikes that require an average of 3 days. The trek involves going through a potentially dangerous environment, or Trail Class 5. This level requires intense physical and mental preparation and should only be attempted by advanced hikers. Examples:
-
Mt. Pinatubo Delta 5 via Sapang Uwak, Pampanga
-
Mt. Ugo-Pulag Traverse, Benguet
-
Mt. Dulang-Dulang- Kitanglad Traverse, Bukidnon
9/9 Difficulty
Major hikes with Trail Class 5 and highly technical and perilous trail features. These hikes take more than 8 hours and typically require an average of 4 days to complete, or less than 3 days if it is an exploratory hike with no assurance of reaching the summit.
This level requires intense physical and mental preparation and should only be attempted by advanced or veteran hikers. Examples:
Aside from these numerical scales, prominent trail features are mentioned in the hiking itineraries to give hikers a picture of what to expect and what preparations are entailed. Examples of these features are “kiss/face the wall” segments, roped segments, rocky faces, and river crossings.
Where to Hike in the Philippines: Beginners, Intermediate, Advanced
 Now, that you’ve run through how the difficulty of Philippine mountains is assessed, continue reading to see how they are indicated in hiking itineraries. Below are famous scenic mountains in the Philippines sorted by the duration of the hike and what level of hikers they are suitable for.
Beginners
These hiking destinations are great entry points for first-time hikers and training climbs for beginners. Going on day hikes through these trails are good opportunities to totally immerse yourself in nature and explore mountain hiking in the Philippines at a leisurely pace.
Daranak Falls −Tanay, Rizal
Daranak Falls is a beautiful cascading waterfall with a catch basin that’s great for a refreshing swim.
Minor, Difficulty 1/9, Trail Class 1
Trail length: 5 Minutes
Osmeña Peak −Mantalongon, Dalaguete, Cebu
Osmeña Peak features jagged hills and boasts a panoramic view of the southwestern coastline of Cebu.
Elevation: 1,013 Meters Above Sea Level (MASL)
Minor, Difficulty 2/9, Trail Class 1-2
Hours to summit: 30 minutes to 1 hour
Mt. Pulag via Ambangeg Trail− Bokod, Benguet
Mt. Pulag is the third highest mountain in the Philippines. The Ambangeg trail offers easy navigation to its summit. This trail runs through pine forests, mossy forests, and beautiful rolling grasslands littered with dwarf bamboos.
Elevation: 2,922+ MASL
Major, Difficulty 3/9, Trail Class 1-2
Days required/Hours to summit: 2 Days/ 4-5 hours
Mt. Maculot-Rockies−Cuenca, Batangas
Mt. Maculot-Rockies, is one of the most popular mountains in Batangas, it features unique rock formations, and offers a stunning view of Taal Lake and tours of Taal Volcano.
Elevation: 706+MASL
Minor, Difficulty 3/9, Trail Class 1-3
Hours to summit: 2-3 hours
Intermediate: Day Hikes
If you’re an experienced hiker looking for a quick but challenging hike, these 5/9 day hikes are for you. Similarly, if you’re a beginner, not a first-timer, looking for a practice climb for an upcoming major hike, these moderately difficult day hikes should help you get into shape.
Mt. Makiling Traverse/ Sto. Tomas- Los Baños Traverse − Batangas and Laguna
Mt. Makiling Traverse will take you through rocky faces, and a tropical rain forest where you can encounter pitcher plants and Rafflesia flowers.
Elevation: 1,090+ MASL
Major, Difficulty 5/9, Trail Class 3 with roped segments
Days required/Hours to summit: 1 day/6-12 hours
Mt. Hibok-Hibok via Crater Trail – Camiguin Island
Mt. Hibok-Hibok boasts a volcanic crater and an unsurpassed 360 view of Camiguin Island.
Elevation: 1,332+ MASL
Minor, Difficulty 5/9, Trail Class 3
Days required/Hours to summit: 1 day/5 hours
Mt. Tapulao−Palauig, Zambales
Mt. Tapulao is famous for its World Tree summit marker, as well as its rocky trails and pine forests.
Elevation: 2,037+ MASL
Major, Difficulty 5/9, Trail Class 1-3
Days required/Hours to summit: 1 day /6-12 hours
Intermediate: Multi-day Hikes
These trails are the perfect adventure if you’re an intermediate hiker who loves to camp in the mountains. These multi-day hikes are no easy feat, but if you’re a highly experienced hiker, you’ll love this challenge! These hiking destinations not only have exciting trails but also unique scenery you’ll never see anywhere else.
Mt. Talinis Traverse/ Bediao-Apolong Traverse − Valencia City, Negros Oriental
Mt. Talinis features a mesmerizing crater lake, an exotic sulphuric river, and a majestic twin waterfall.
Elevation: 1,328+ MASL
Major, Difficulty 6/9, Trail Class 2-4 with stream-crossing
Days required/Hours to summit: 2-3 days/10-11 hours
Mt. Apo via Kidapawan-Magpet Trail – Kidapawan City, North Cotabato
Mt Apo is the highest mountain in the Philippines. Kidapawan-Magpet Trail features craggy rockscapes, mossy swamps, as well as mystical lakes, waterfalls, and rivers.
Elevation: 2,956+ MASL
Major, Difficulty 7/9, Trail Class 3
Days required/Hours to summit: 2-3 days/10-11 hours
Mt. Kanlaon via Mapot-Masulog – Canlaon City, Negros Oriental
Mt. Kanlaon is the highest mountain in the Visayas. It features a majestic crater summit, and a pristine waterfall and lake.
Elevation: 2,436+ MASL
Major, Difficulty 7/9, Trail Class 2-4
Days required/Hours to summit: 2-3 days/10-11 hours
Advanced
If you’re advanced hiker looking for the next challenging summit to conquer, these Philippine mountains belong on your hiking bucket list. These mountains have earned a certain level of fear even among the most veteran hikers. These mountains test the toughest of climbers even after intense physical training and mental preparation. If you’re up for the challenge, embark on these hiking destinations at your own risk.
Mt. Dulang-Dulang-Mt. Kitanglad Traverse – Lantapan, Bukidnon
Mt. Dulang-Dulang is the second-highest mountain in the Philippines. It is famous for its mystical forest with moss-covered trees.
Elevation: 2,938+ MASL
Major, Difficulty 8/9, Trail Class 2-4 with roped segments
Days required/Hours to summit: 3 days/10-11 hours
Mt. Guiting-Guiting – Sibuyan Island, Romblon
Mt. Guiting-Guiting features the infamous Knife Edge trail which is a rocky ridge with deep ravines on each side. Not only physically demanding to scale, but it is also unbelievably frightening.
Elevation: 2,058+ MASL
Major, Difficulty 9/9, Trail Class 5 with precarious rock formations and “kiss the wall” segments
Days required/Hours to summit: 3 day /10-13 hours
Mt. Halcon – Baco, Oriental Mindoro
Mt. Halcon also features the treacherous Knife Edge trail, which is a rocky ridge that challenges both the physical and mental capacity of even the most seasoned trekkers.
Elevation: 2,582+ MASL
Major, Difficulty 9/9, Trail Class 2-4 with river crossings
Days required/Hours to summit: 3-4 day /15-18 hours
What level of hiking experience do you have? Consider that when choosing which of the above-mentioned Philippine mountain to take on. Additionally, take note that no matter how low the indicated difficulty level of a mountain is, don’t neglect the importance of sufficient preparation and training.
Exercise daily even before an easy day hike to Mt. Maculot. Your exercise should increase in intensity and frequency, the more difficulty your upcoming climb will be.
How to Plan a Hiking Trip in the Philippines

Now that you have a good gauge of the difficulty level of several mountains in the Philippines, you probably already have an idea on which Philippine summit you want to scale first.
Now, it’s time to talk about how to start planning your hiking trip. When is the best time to climb a mountain in the Philippines? What planning options do you have? What should you prepare for the hike? Read on and find out!
Best Time to Hike
Weather is an important factor to consider when planning a hike. This is particularly crucial in the Philippines where the tropical climate can cause varying weather disturbances that can make an easy trail into a difficult and dangerous one.
Tropical weather can sometimes be unpredictable; experiencing scattered rain showers is not uncommon when hiking in the Philippines, nor is experiencing a downpour for an hour and then witnessing bright and sunny skies the next.
To be prepared, keep an eye out for weather outlook and forecasts. Tools such as Accuweather come in handy when planning a hike.
Taking note of monthly general weather conditions in the Philippines can also help. November through February are typically cold and dry seasons, while it is generally hot and dry from March to April. On the other hand, typhoon season runs from May through October.
However, keep in mind that this monthly pattern is not always reliable. Hence, when hiking in the Philippines, it’s best to prepare for all kinds of weather conditions. Always pack a poncho, and at the same time, a cap and a bottle of sunscreen.
Types of Hiking Tours
 Because of the increasing popularity of mountaineering in the Philippines, there are now several ways to go about when planning a hiking trip. Aside from going DIY, there are several organizers of hiking tours in the Philippines. Before you make a final decision, consider these options:
Do-It-Yourself (DIY)
As the name implies, you have to organize every detail of your hiking trip on your own; from choosing a destination to making the itinerary, arranging your transportation, to booking a guide, and to preparing meals. This is a great choice if you’re planning to hike with a group of friends.
Pros: The more company you have, the cheaper the costs will be since you’ll be spreading out the expenses. You can also customize your itinerary.
Cons: Arranging everything on your own can be tedious and stressful. Unless you’re a professional organizer, you might overlook critical details that can affect your hiking experience.
Joiners/Shared Tours
The rising popularity of hiking in the country has given rise to several hiking organizers. There is now a wide selection of group tours pre-arranged by travel agencies and individual organizers wherein you can join in for a fixed price per hiking destination. This is perfect for solo hikers who simply want to climb the mountains in peace and not have to worry about the logistics.
Pros: Everything is taken care of for you; from transportation to the itinerary, to guides, and sometimes even your photo-ops. All you have to do is show up at the meet-up place. The fixed-rate for booking your slot in the group tour is also reasonably priced.
Cons: Slots are limited. So, if you’re not quick to spot great group deals you can join in, you’ll have to wait for the next available shared tour or look for another organizer.
Private Tour Packages
Private hiking tour packages also combine the convenience of an arranged tour and the benefits of a customizable itinerary and package features. If you don't like crowds and prefer to be paid closer attention to by the guide or tour coordinator, then going on a private hiking tour in the Philippines is the way to go.
Pros: Everything is planned for you, so you can fully enjoy your hiking adventure. You can customize select tour features, package inclusions, and itineraries. And because it’s a private tour, you or your group will attend more closely by your hiking coordinator and guide.
Cons: It may cost a bit more since it is a private guided tour.
What to Wear and to Bring

Being prepared and having the right hiking gear allows you to have a safe and enjoyable hike. Here is a checklist you can consult to make sure you don’t miss a thing.
Proper Trekking Attire and Gear
First things first; make sure that you are wearing proper hiking attire to ensure uncompromised mobility and comfort. Here are the recommended trekking attire and gear for both day or multi-day hike:
- Trekking Shirts-quick drying, breathable, and moisture-wicking (Ei. Dri-fit)
- Trekking Pants or Compression Leggings
- Windbreaker Jacket for rainy climbs
- Trekking shoes with Lug sole/ deeply indented outsole for traction
- Synthetic socks/ Thermal socks for cold weather
- Sunglasses / Bonnet/ Bandana/Cap
- Trekking pole
For hiking in extreme cold, observe proper layering:
- 1st Layer/ Base Layer - wool, synthetic fabric, polyester or silk shirt.
- 2nd Layer/ Insulating Layer -fleece sweater or Down jacket
- 3rd Layer/ Outer Layer -windbreaker jacket or Thermal jacket
Hiking Essentials
Whether you’re on a day hike or camping, don’t forget to pack these essentials in your backpack:
- Rain cover for your backpack
- Flashlight and headlamp
- Post-hike footwear
- Gloves
- Poncho or raincoat
- Quick-dry towels
- First Aid kit and personal medications
- Whistle
- Swiss knife / Utility Knife
- Bug spray/ insect repellent
- Alcohol
- Sunblock (SPF30)
- Dry bags and trash bags
- ID w/ Emergency Contacts and Blood Type
- Powerbank and extra batteries
- Tissue paper
- Wet Wipes
- Soap / Shampoo
- Toothbrush / Toothpaste
Must-Haves for Day Hikes
Aside from the proper trekking attire and hiking essentials listed above, prepare these day hike must-haves:
- Hiking backpack (11- 20 liters capacity)
- 1 Set of Post-hike Clothes (Shirt, pants, and undergarments)
- 2-3 Litres of Water/ Hydration Pack/ Bladder
- Trail Food such as Chocolate bars, oatmeal bar, energy bars, nuts, gelatin
- Trashbag
- Packed breakfast/lunch/dinner
- Eating utensils (Spoon, fork, plate, bowl, and cup) or a mess kit
- Collapsible tumbler
Must-Haves for Multi-day Hikes
Hiking and camping in the mountains require extra preparations and extra gear. Here are the things you shouldn’t forget before setting out to your overnight hike:
- Hiking backpack (40 liters + capacity) with rain cover
- Full Fly Camping Tent (i.e. Tadpole Tent), pegs, and groundsheet
- Sleeping Bag and earth pad
- Camping Stove, cook set, and butane
- Easy to cook camping food (Instant Noodles/ Canned Goods)
- Instant Coffee/ Choco
- Mess Kit/ Eating utensils
- Set of hiking clothes and undergarments depending on the duration of the hike
- 1 Set of Post-hike Clothes (Shirt, pants, and undergarments)
- Post-hike footwear
- Trail Food such as Chocolate bars, oatmeal bar, energy bars, nuts, gelatin
Trails that require more than multiple days of hiking usually have water sources where hikers can replenish their bottles. 1 liter can generally last for 2 hours if the weather isn’t too hot or humid. Assuming that the average interval between water sources is 4 hours, bringing at least 3 liters of water to see you through the next water source.
Hiking Etiquette: Do’s and Don’ts

Whether you’re a beginner or an advanced hiker, make sure to practice the following do’s and don'ts when hiking in the mountains to show respect not just to nature but to your fellow hikers.
Practice “Leave No Trace” Principle
Always pick up after yourself. Don’t throw your garbage along the trails or in your campsite. Keep a trash bag in your backpack and store your trash there temporarily. Make sure that you’re not dropping plastic wrappers from your trail food, or leaving empty water bottles, used tissues, etc. Leave nothing but footprints, take nothing but photographs.
Stay on the Trail
Don’t stray from the established trail nor try to take another path, as this necessarily damages the surrounding plants. Additionally, don’t cut down trees or damage any vegetation to set up camp. Only pitch tents at dedicated campsites.
As hikers, always aim to make the least impact on the mountains you visit to keep them healthy and to maintain their beauty.
Keep Unnecessary Noise to a Minimum
Don’t blast loud music while hiking. This does not disturb only local wildlife, but it also disrespects other mountaineers who prefer to hike in silence or listen to the sounds of nature. Use your earphones if listening to music helps you hike.
Be Compassionate and Helpful to Fellow Hikers
If you see any hiker encountering some kind of difficulty along the trail assist them as much as you can. If a fellow hiker ran out of trail food and you have more to spare, offer it to him/her. What comes around goes around.
Observe ‘Right of Way’ on the Trails
Always give way to locals who are going about their daily lives. If you are descending, give way to hikers who are going uphill. Additionally, if your pace is slow, make way for fast-moving hikers. Similarly, if you are fast, politely ask slow-moving hikers for permission to advance on the trail.
Be Nice to Your Local Guides and Treat them with Respect
Introduce yourself to the guide and make your guide feel like a part of your group. Invite them during socials, and offer them food and water. If your guide is moving too fast and way ahead of the team, politely ask him/her to slow down. Additionally, if you ask the guide to act as a porter, make sure to give extra compensation.
Hiking Tips for Beginners
 First time to hike? Don’t fret. With enough preparation, you can conquer the trails! Here are some practical tips to keep in mind:
Do your research before embarking on any hiking trip
Consider the difficulty level of a mountain or trail, as well as its features, and weather so you can plan ahead and prepare accordingly.
Don’t be overconfident and careless when negotiating any trail
Always look where you’re stepping, and be mindful of your surroundings. It’s safer to refrain from using headphones so you don’t compromise your situational awareness and you can hear any warning calls.
- Read our article on travel insurance in the Philippines
Don’t start your hike aggressively
Find a comfortable pace you can maintain through the whole hike and save your energy. Pace yourself, so you don’t use up all of your strength during the first few minutes of the hike.
Invest in high quality and durable hiking gear
Don’t scrimp on items such as your hiking back-up, trekking shoes, and trekking pole. Buying cheap gear that break after one hike is wasteful. If it costs a lot, look for reviews to gauge its durability. If there are many positive reviews, then maybe investing in it is worth it.
Sample Hiking Itineraries: Mt. Ulap and Mt. Pulag-Ambangeg
Now that you know the basics of which mountains to explore, what to wear and to bring, and how to prepare, it’s time to plan out your itinerary. Some multi-day hikes start with Day 0, wherein the only scheduled itinerary is the travel period going to the jump-off point of the mountain. Here are some examples to take inspiration from:
Hiking Mt. Ulap: Sample Day Hike Itinerary
 The day hike to Mt. Ulap features idyllic rolling hills, picturesque pine ridges, and towering rock formations. The highlight of the climb is the huge Gungal Rock. Mt. Ulap is the ideal day hike for hikers of all levels. It's one hiking destination example that observes the Day 0 schedule since you need to travel long hours from Manila to Baguio City in North Luzon.
Jump-Off Point: Ampucao Itogon Benguet
Exit Point: Sta. Fe Itogon Benguet
Elevation: 1846 MASL
Days required / Hours to summit: 1 day / 2-3 hours
Difficulty 3/9, Trail class 1-3
Day 0: Travel to Baguio City
- 10:00 PM - ETD from Manila to Baguio City
Day 1: Hike and Travel to Manila
- 4:00 AM - Arrive at Baguio. Take a jeepney from Burnham Park to Brgy. Ampucao
- 4:40 AM - ETA Brgy. Ampucao. Register and secure a guide at the Barangay Hall
- 5:00 AM - Start trek
- 7:30 AM - ETA Gungal Rock. Take photographs on the rock
- 8:30 AM - ETA Mt. Ulap Summit. Take photographs at the summit
- 11:30 AM - ETA Sta. Fe Exit Point. Get on a jeepney to Baguio
- 12:30 PM - ETA Baguio. Ride bus back to Cubao
Hiking Mt. Pulag via Ambangeg Trail: Sample Overnight Day Hike Itinerary
 Mt. Pulag is the third highest mountain in the Philippines. Thanks to the Ambangeg trail, hikers of any level can experience the raw beauty and witness its iconic sea of clouds at the summit. This trail runs through pine forests, mossy forests, and grasslands. Though it's regarded as a day hike of Mt. Pulag's Ambangeg Trail, the travel time from Manila requires travelers to stay overnight (homestay or camping) in the area before the actual hike.
Jump-off Point: Ambangeg Ranger Station, Bokod, Benguet
Elevation: 2,922+ MASL
Major, Difficulty 3/9, Trail Class 1-2
Days required/Hours to summit: 2 Days/ 5-6 hours
Day 1: Travel from Manila to Baguio City
- 03:00 AM - ETD from Manila to Baguio City
- 07:00 AM - ETA at Baguio City. Breakfast.
- 11:00 AM- ETA Visitors' Center for registration and orientation
- 11:30 AM - Travel to Ranger Station
- 12:30 AM- ETA at Ranger Station to check-in at homestay or set up camp. Lunch.
- 1:00 PM - Free time. This is your chance to do Baguio tours.
- 6:00 PM - Dinner
Day 2: Early Morning Hike and Travel to Manila
- 01:30 AM - Wake up call. Breakfast.
- 02:00 AM - Start early morning hike to the summit
- 05:45 AM - ETA at Mt. Pulag summit to watch sunrise and sea of clouds
- 07:00 AM - Start descent
- 11:00 AM - ETA at Ranger Station. Wash up and eat lunch.
- 12:00 NN - ETD from Ranger Station
- 1:00 PM- ETA at Visitors' Center to log out
- 3:00 PM - ETA at Baguio City
- 6:00 PM- Dinner on the road
- 9:00 PM - ETA in Manila
Explore the Philippine Mountains!

In the Philippines, mountaineering has become such a popular recreational activity for many Filipinos. So, if you want to take your travel experience to the next level, go hiking in the Philippines! It’s a great opportunity to immerse in nature and meet locals!
Beyond beautiful beaches and stunning islands, the Philippines truly has so much to offer. As you’ve learned, the country is blessed with many majestic mountains with gorgeous summit sceneries. On top of that, the Philippines has a wide selection of mountains with varying levels of difficulty. So, whether you’re a beginner or a seasoned hiker, you’ll find the perfect summit to conquer.
- Find cheap flights to the Philippines:
- Book tickets to Manila:
Thanks to the country’s geography, Philippine mountains boasts exotic biodiversity and unique trail features. From volcanic trails to grassy slopes, to cascading falls and massive rock formations, the Philippines doesn’t run out of fascinating hiking destinations.
If you prefer leisurely treks, hike to the waterfall trails of Taytay or Daranak in Rizal. If you want to unplug and immerse in nature without sweating too much, then head to Mt. Batulao and other mountains in Batangas.
If you’d rather witness a sea of clouds, then trekking to Mt. Ulap or hiking Mt. Pulag in Benguet is your best bet. But if you’re up for more excitement, the volcanic mountains of Mt. Apo and Mt. Kanlaon in the Visayas and Mindanao are sure to get your pulse racing. Whether you’re a nature-lover or a thrill-seeker, there is a Philippine summit for you to explore.
Take your Philippine adventure to new heights, and climb a mountain! Read more of our travel guides and check hiking tours to add to your travel itinerary.